how to do the label clouds widget (xhtml)
>> Sunday, September 12, 2010
take note : this tutorial is for people who is using xhtml, the new version, not html.
the first thing that you must do is, just go to your blogger Design > Page Elements page. click Add a gadget on a Add a Page Element Option on that page. then add the Labels Widget there.

After Adding the Label Widget Go to Layout > Edit Html (warning : do not expand the widget templates)
You will find some code similar to
<b:widget id='Label1' locked='false' title='Labels' type='Label'/>
Now Replace that with
<b:widget id='Label1' locked='false' title='Labels' type='Label'>
<b:includable id='main'>
<b:if cond='data:title'>
<h2><data:title/></h2>
</b:if>
<div expr:class='"widget-content " + data:display + "-label-widget-content"'>
<b:if cond='data:display == "list"'>
<ul>
<b:loop values='data:labels' var='label'>
<li>
<b:if cond='data:blog.url == data:label.url'>
<span expr:dir='data:blog.languageDirection'><data:label.name/></span>
<b:else/>
<a expr:dir='data:blog.languageDirection' expr:href='data:label.url'><data:label.name/></a>
</b:if>
<b:if cond='data:showFreqNumbers'>
<span dir='ltr'>(<data:label.count/>)</span>
</b:if>
</li>
</b:loop>
</ul>
<b:else/>
<div id='labelCloud'/>
<p align='center'>
<script type='text/javascript'>
var cloudMin = 1;
var maxFontSize = 30;
var maxColor = [35,130,196];
var minFontSize = 13;
var minColor = [35,130,195];
<b:if cond='data:showFreqNumbers'>
var lcShowCount = true;
<b:else/>
var lcShowCount = false;
</b:if>
// Don’t change anything past this point -----------------
// Cloud function s() ripped from del.icio.us
function s(a,b,i,x){
if(a>b){
var m=(a-b)/Math.log(x),v=a-Math.floor(Math.log(i)*m)
}
else{
var m=(b-a)/Math.log(x),v=Math.floor(Math.log(i)*m+a)
}
return v
}
var c=[];
var labelCount = new Array();
var ts = new Object;
<b:loop values='data:labels' var='label'>
var theName = "<data:label.name/>";
ts[theName] = <data:label.count/>;
</b:loop>
for (t in ts){
if (!labelCount[ts[t]]){
labelCount[ts[t]] = new Array(ts[t])
}
}
var ta=cloudMin-1;
tz = labelCount.length - cloudMin;
lc2 = document.getElementById('labelCloud');
ul = document.createElement('ul');
ul.className = 'label-cloud';
for(var t in ts){
if(ts[t] < cloudMin){
continue;
}
for (var i=0;3 > i;i++) {
c[i]=s(minColor[i],maxColor[i],ts[t]-ta,tz)
}
var fs = s(minFontSize,maxFontSize,ts[t]-ta,tz);
li = document.createElement('li');
li.style.fontSize = fs+'px';
a = document.createElement('a');
a.title = ts[t]+' Posts in '+t;
a.style.color = 'rgb('+c[0]+','+c[1]+','+c[2]+')';
a.href = '/search/label/'+encodeURIComponent(t);
if (lcShowCount){
span = document.createElement('span');
span.innerHTML = '('+ts[t]+') ';
span.className = 'label-count';
a.appendChild(document.createTextNode(t));
li.appendChild(a);
li.appendChild(span);
}
else {
a.appendChild(document.createTextNode(t));
li.appendChild(a);
}
ul.appendChild(li);
abnk = document.createTextNode(' ');
ul.appendChild(abnk);
}
lc2.appendChild(ul);
</script>
</p>
<noscript>
<b:loop values='data:labels' var='label'>
<span expr:class='"label-size label-size-" + data:label.cssSize'>
<b:if cond='data:blog.url == data:label.url'>
<span expr:dir='data:blog.languageDirection'><data:label.name/></span>
<b:else/>
<a expr:dir='data:blog.languageDirection' expr:href='data:label.url'><data:label.name/></a>
</b:if>
<b:if cond='data:showFreqNumbers'>
<span class='label-count' dir='ltr'>(<data:label.count/>)</span>
</b:if>
</span>
</b:loop>
<br/>Powered By:<small><a href='http://www.bloggerplugins.org'>Blogger Gadgets</a></small>
<br/><small><a href='http://www.bloggerplugins.org/2008/06/label-cloud-widget-for-blogger-blogspot.html'>Label Cloud for Blogger</a></small>
</noscript>
</b:if>
<b:include name='quickedit'/>
</div>
</b:includable>
</b:widget>Now find
]]></b:skin>
#labelCloud {text-align:center;font-family:arial,sans-serif;}
#labelCloud .label-cloud li{display:inline;background-image:none !important;padding:0 5px;margin:0;vertical-align:baseline !important;border:0 !important;}
#labelCloud ul{list-style-type:none;margin:0 auto;padding:0;}
#labelCloud a img{border:0;display:inline;margin:0 0 0 3px;padding:0}
#labelCloud a{text-decoration:none}
#labelCloud a:hover{text-decoration:underline}
#labelCloud li a{}
#labelCloud .label-cloud {}
#labelCloud .label-count {padding-left:0.2em;font-size:9px;color:#000}
#labelCloud .label-cloud li:before{content:"" !important}
]]></b:skin>
and save your template and tadaa!!! eh eh, wait, still got more.
last step;;
u must configure the Gadget from the Gadget Options.

and tadaaaa!!!
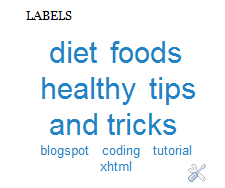
it will looks better when you hv more labels.
p/s : send me a request if you need a tutorial on how to change the colour and customize the clouds to a better level.
0 comments:
Post a Comment